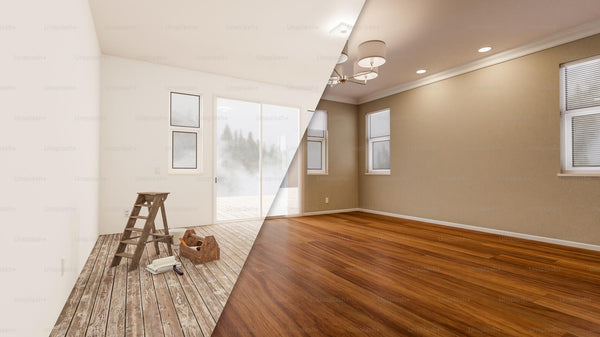
Now that you're wondering, let's look at this step-by-step guide to painting rooms in a new house.
Painting rooms in your new home can be an exciting and rewarding project. Whether you are a beginner or have some experience, this step-by-step guide will help you achieve professional-looking results. By following these simple instructions, you can transform your new house into a personalized and inviting space.
Choosing the Right Paint
Before you begin painting, it is important to choose the right paint for your project. Consider factors such as the type of surface you will be painting, the desired finish, and the color scheme you want to achieve. There are various types of paint available, including latex, oil-based, and water-based paints. Each type has its own advantages and disadvantages, so it's essential to do some research and select the one that best suits your needs.
When selecting paint colors, keep in mind the mood and atmosphere you want to create in each room. Lighter colors can make a space feel more open and airy, while darker colors can add depth and coziness. Don't be afraid to experiment with different shades and tones to find the perfect color palette for your new home.
Preparing the Room
Proper preparation is key to achieving a professional-looking paint job. Start by removing any furniture, decorations, and fixtures from the room. Cover the floor and any remaining items with drop cloths or plastic sheets to protect them from paint splatters.
Next, inspect the walls for any imperfections such as cracks, holes, or uneven surfaces. Use spackling compound or putty to fill in any holes and sand the walls to create a smooth surface. This step is crucial for ensuring a flawless paint finish.
Priming the Walls
Priming the walls is an important step that should not be overlooked. Primer helps the paint adhere better to the surface, provides a consistent base color, and helps to hide any existing stains or discolorations. Apply a coat of primer using a roller or brush, making sure to cover the entire surface evenly. Allow the primer to dry completely before moving on to the next step.
Painting Techniques
Now comes the fun part – painting the walls! Start by cutting in the edges using a brush. This involves painting a narrow strip along the corners, ceiling, and baseboards. This technique creates a clean and professional-looking finish.
Once the edges are done, use a roller to paint the rest of the walls. Start from the top and work your way down, applying even pressure and overlapping each stroke slightly. This will ensure an even and consistent coat of paint. Remember to take breaks and step back occasionally to assess your progress and make any necessary touch-ups.
For a more textured look, you can experiment with different painting techniques such as sponge painting, rag rolling, or stenciling. These techniques can add depth and visual interest to your walls.
Clean-Up and Final Touches
After you have finished painting, it's important to clean up properly. Remove any painter's tape while the paint is still slightly wet to avoid peeling. Clean your brushes and rollers thoroughly with soap and water or the appropriate cleaning solution for the type of paint you used.
Once the paint has dried completely, you can begin putting the room back together. Reinstall any fixtures, decorations, and furniture that were removed. Take a moment to admire your hard work and enjoy the transformation of your new home.
For more detailed information and tips on painting rooms in your new home, check out these credible resources: